


Docker is a tool to run applications in an isolated environment and it’s an open-source project.
Docker is static binary, which you can download on to your server, run it as daemon, once the daemon is running, you can run the client, type commands and it will pass commands to daemon and you are in business. In Docker application, a container always runs in the same environment irrespective of the operating system.
I know there are many container based solutions, including Virtual machines, however the main difference between Virtual Machines and Docker containers is that Virtual Machines consists of a Guest OS i.e. it has to have its own kernel whereas Docker container uses host OS i.e. Host kernel to run its application, resulting in very less consumption of resources. So, users can run multiple containers at once in Docker without putting heavy load on host machine. Usual containers are basically miniature servers, whereas, Docker is used as a unit of software delivery, so we can say that it is an envelope for running an application.
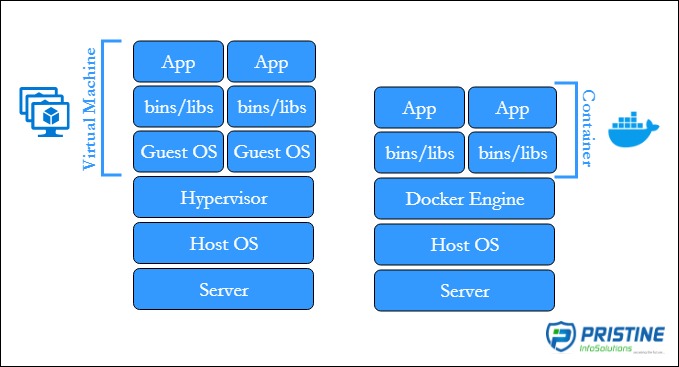
“Virtual Machine vs. Docker”
Windows
1. Download Docker
2. Double-click InstallDocker.msi to run the installer.
3. Follow the Install Wizard: accept the license, authorize the installer and proceed with the installation.
4. Click Finish to launch Docker.
5. Docker starts automatically.
6. Docker loads a “Welcome” window giving you tips and access to the Docker documentation. That’s it !!
Kali Linux
Preparation
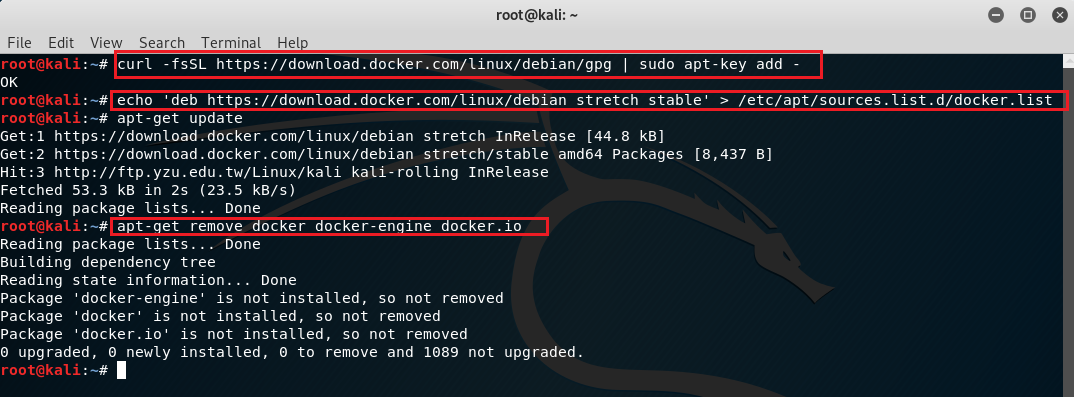
1. Add Docker pgp key:
curl -fsSL https://download.docker.com/linux/debian/gpg | sudo apt-key add –
2. Configure Docker apt repository:
echo 'deb https://download.docker.com/linux/debian stretch stable' > /etc/apt/sources.list.d/docker.list
3. Update
apt-get update
4. Cleaning old Docker
As we want a clean installation, what we do is verify that there are no obsolete versions and we give it :
apt-get remove docker docker-engine docker.io
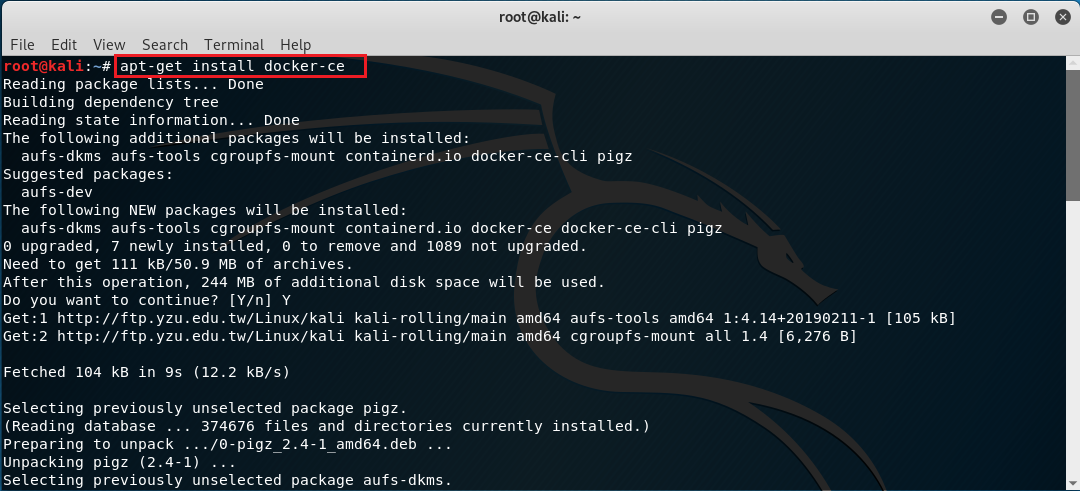
Install Docker:
apt-get install docker-ce
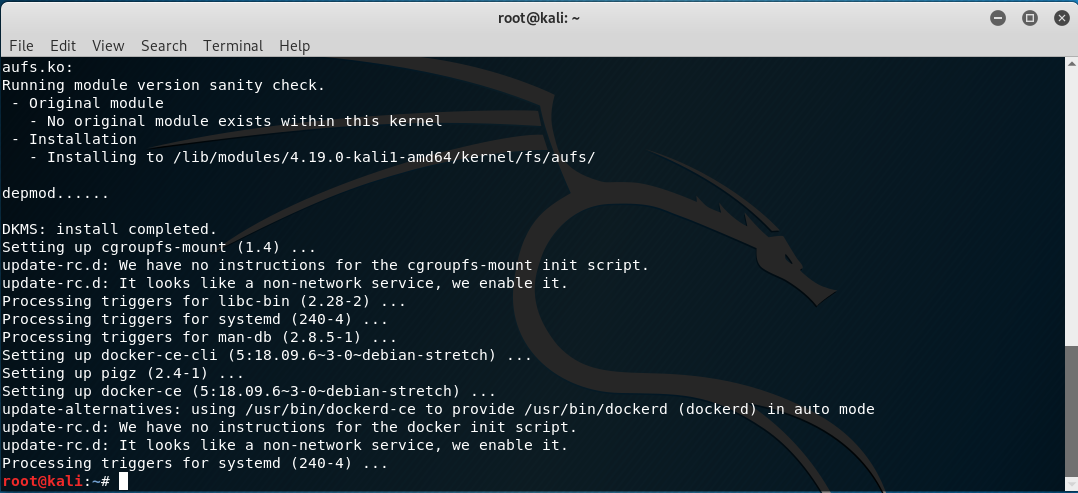
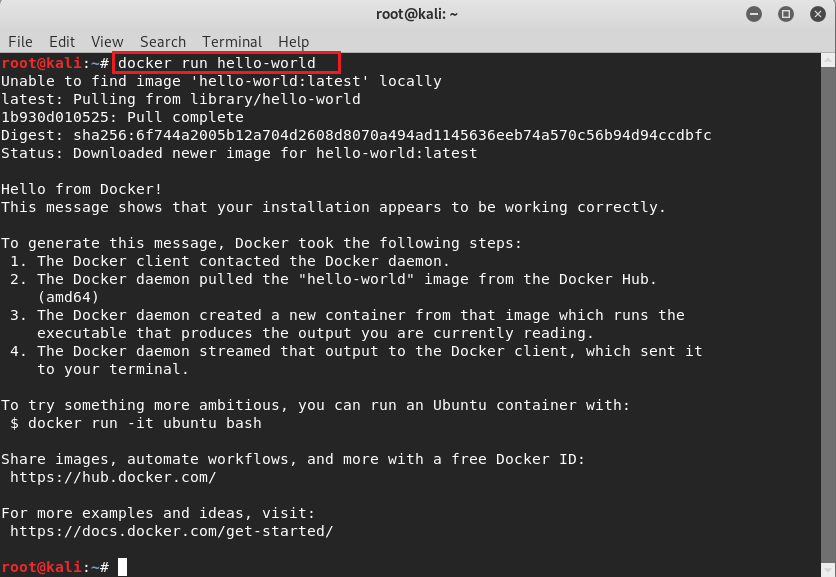
Verify if it was installed correctly
docker run hello-world
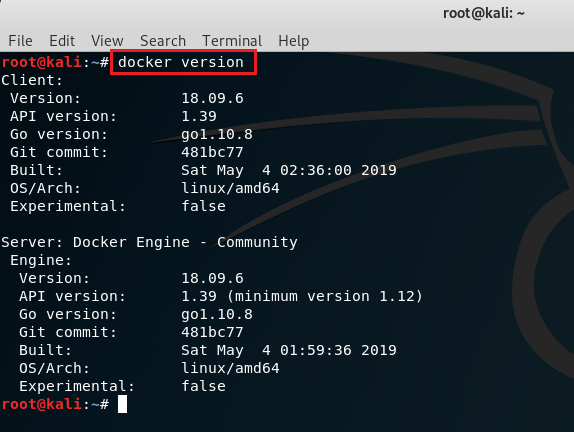
Watch the version
docker version
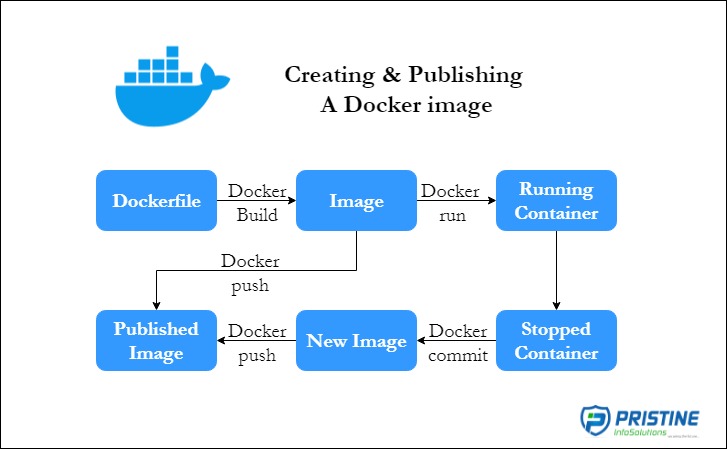
As discussed earlier, the process of building a Docker image is using a Dockerfile as per our requirements and getting instance of a Docker container. And, if needed, publishing the Docker image now or after committing the modified container as a Docker image as shown in the diagram below.
Now to understand Docker and its additional uses, let’s create a very simple hello world application in PHP and publish it.
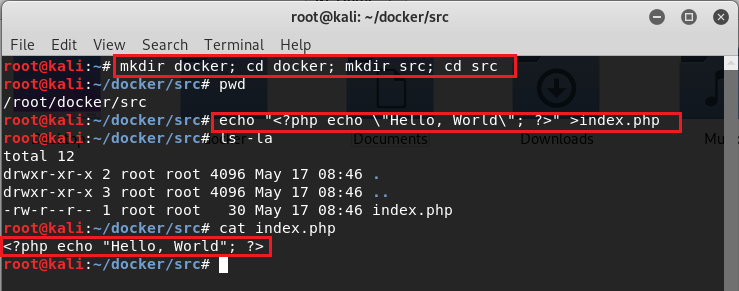
1.Let’s create a file index.php in a directory of my choice /root/docker/src/index.php with following content.
<?php echo "Hello, World"; ?>
Commands for the same in linux are :
- mkdir docker; cd docker; mkdir src; cd src   #creating directory named docker and src and moving into those directories.
- pwd #checking the path
- echo "<?php echo \"Hello, World\"; ?>" >index.php  #creating index.php file with content
- ls -la   #listing files
- cat index.php  #reading index.php file
2. Now let’s start the process of creating a Docker image by creating Dockerfile in the docker directory.
3. First we need a ready php Docker image. So visit URL https://hub.docker.com/ and search for php
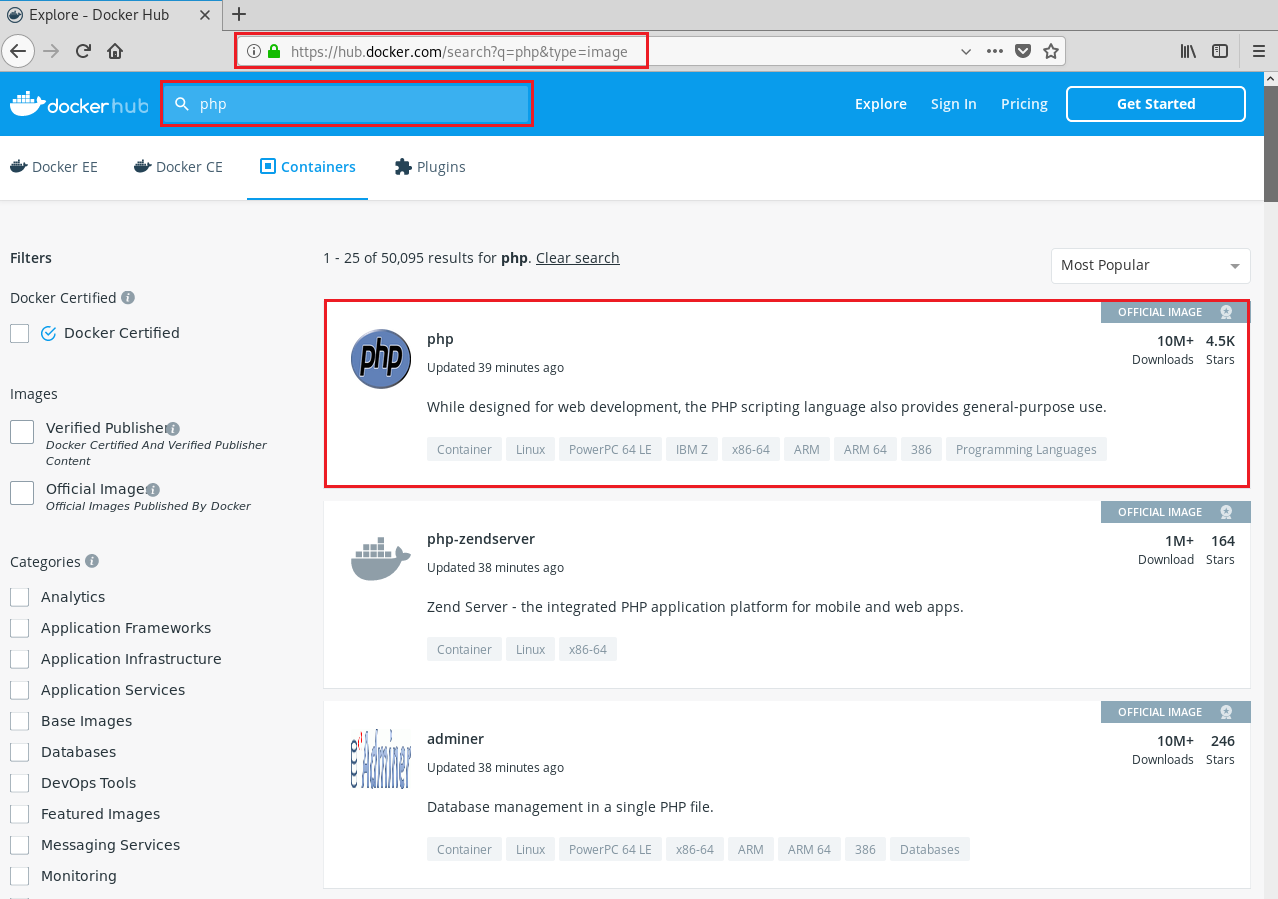
4. As we can see in official php image there are different Supported tags.
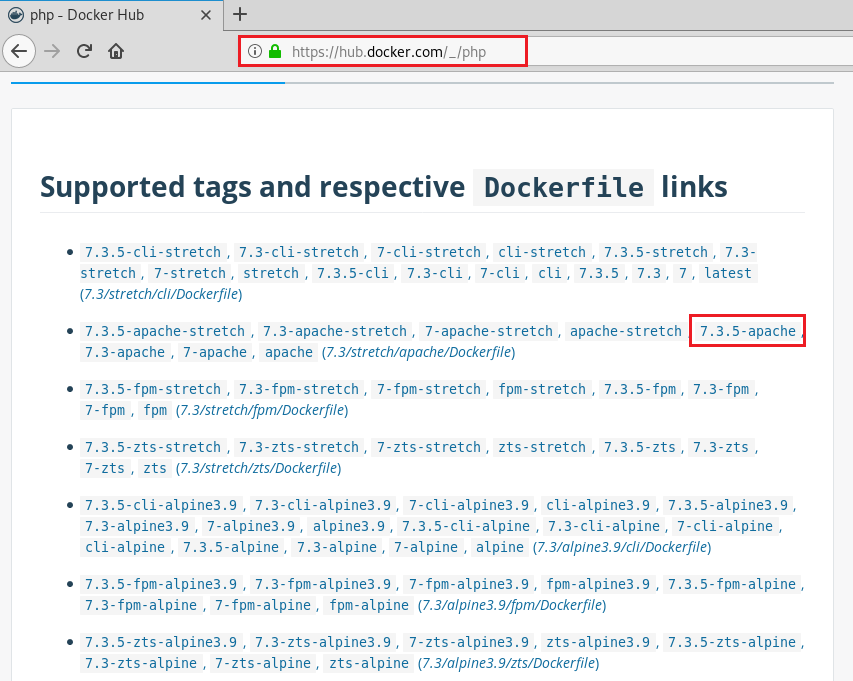
5. We will choose 7.3.5-apache, a fixed version so that in future it should not break due to updates.
6. As scrolling down we can see How to use this image section.
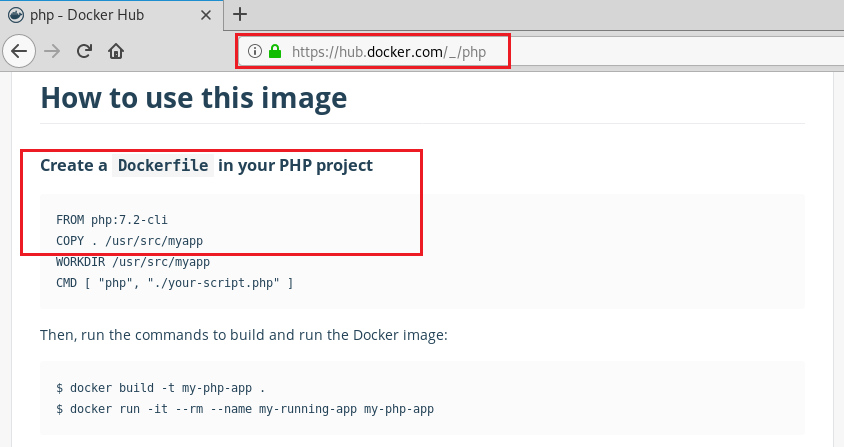
Now let’s add content to our Dockerfile as per our requirements.
7. Using any editor, create a file named Dockerfile in docker directory and add following content to it and save.
FROM php:7.3.5-apache

COPY src/index.php /var/www/html/

EXPOSE 80
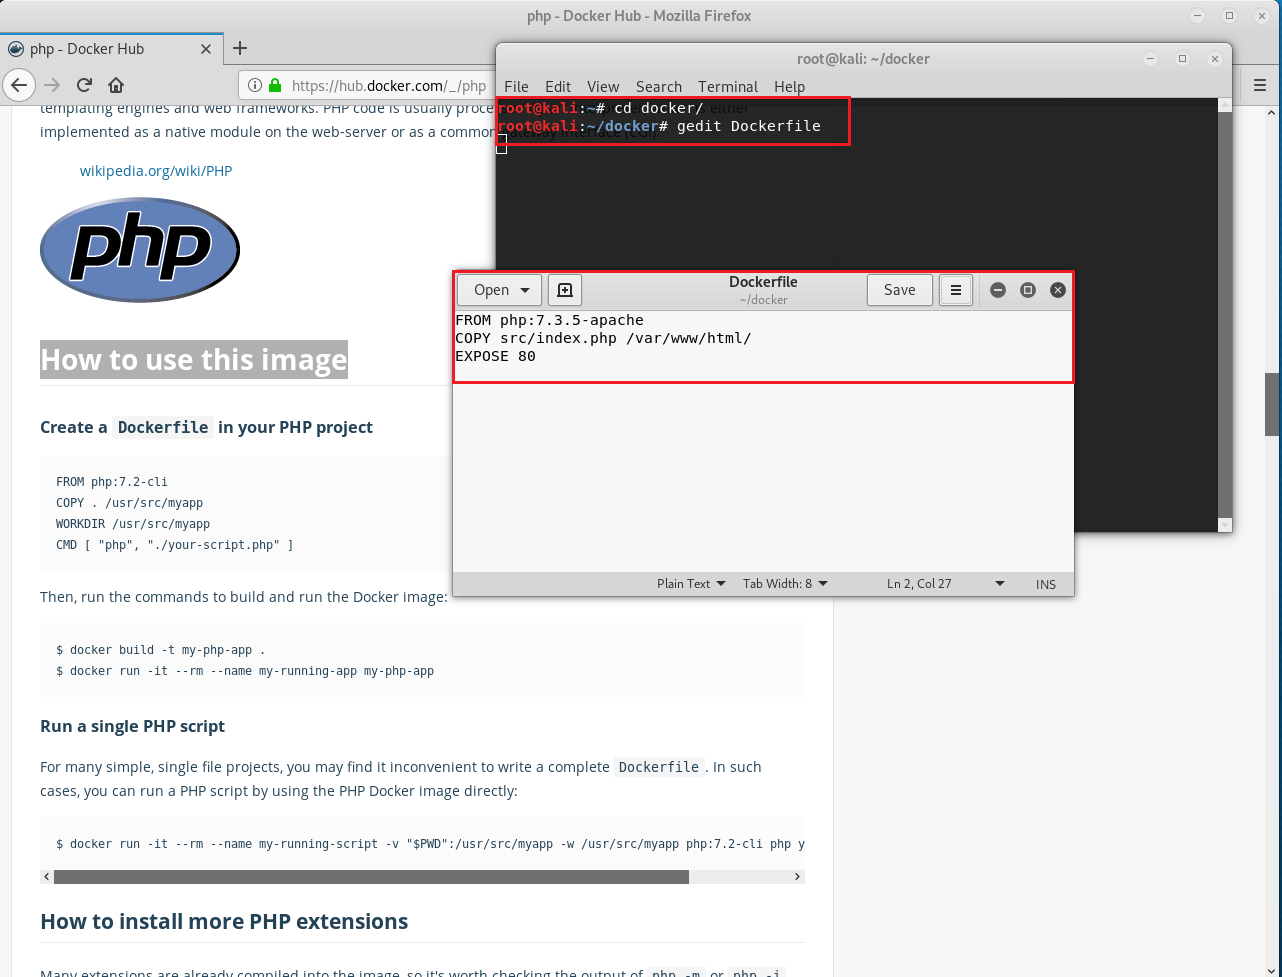
8. When you put EXPOSE 80 (or any port you want) in your Dockerfile that’s going to tell Docker that your container’s service can be connected to on port 80. It doesn’t set up any networking properties. You can think of it more like a runtime configuration option that’s explicitly stated in your Dockerfile.
9. First let’s check how many images are there by doing
docker images

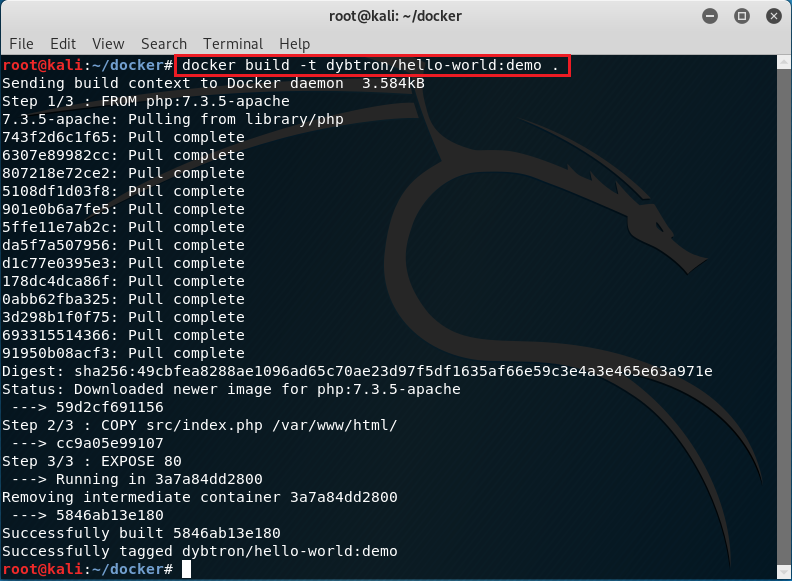
10. Now let’s build the Docker image by running command
docker build -t dybtron/hello-world:demo .
                                   In this command
                                   docker build [OPTIONS] PATH
                                   docker - The base command for the Docker CLI.
                                   build  - will build an image from a Dockerfile
                                   -t ; --tag  - Name and optionally a tag in the ‘name:tag’ format
                                   dot [.] – is the path for current directory
11. Above command will build the Docker image named dybtron/hello-world and is tagged as demo using the Dockerfile in the docker directory.
12. It might take few minutes depending on the internet speed. Once the process is done, we should get two images; php and dybtron/hello-world:demo . To check let’s run again the command
docker images

13. So now let’s run the Docker image
docker run -p 80:80 –t dybtron/hello-world:demo
In this command
docker run [OPTIONS] IMAGE [COMMAND]
docker - The base command for the Docker CLI.
--tty , -t	- Allocate a pseudo-TTY
--publish , -p -  Publish a container’s port(s) to the host
14. As we can see the Docker image is running and container is ready to be used. In above command we are running dybtron/hello-world:demo image by publishing the docker port 80 to localhost port 80.
15. So now let’s verify if it’s working by visiting localhost in the browser.
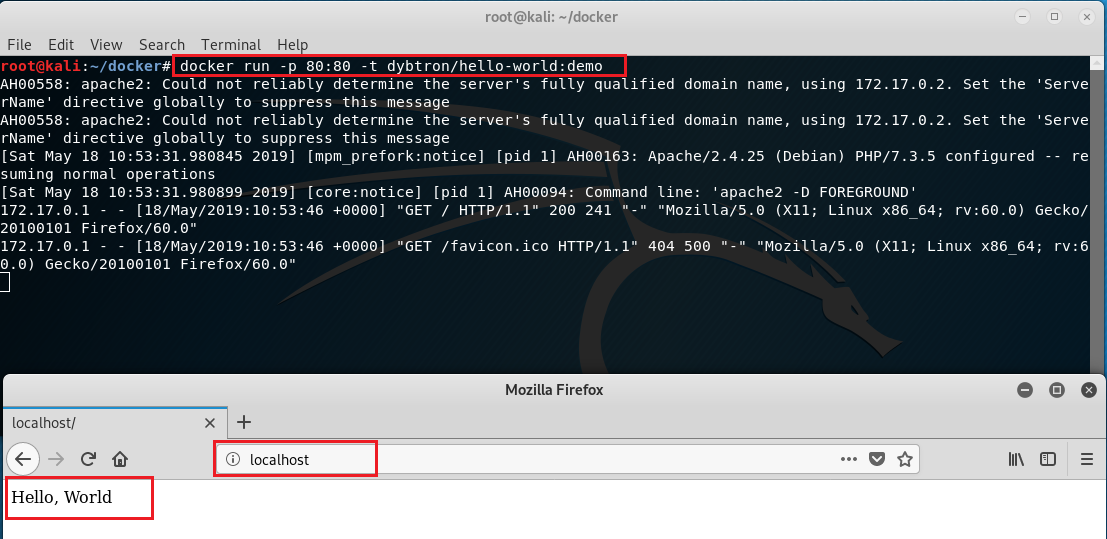
As we can see, it’s working.
16. Now let’s publish the image publically. For this, we need to first login to http://docker.io using Docker.
docker login docker.io
When it will prompt for username and password, submit the value.

Now we are ready to publish.
17. Let’s publish by running the command
docker push dybtron/hello-world:demo
18. Now let’s check if it’s published by logging in to http://hub.docker.io/ . And we can see it’s published.
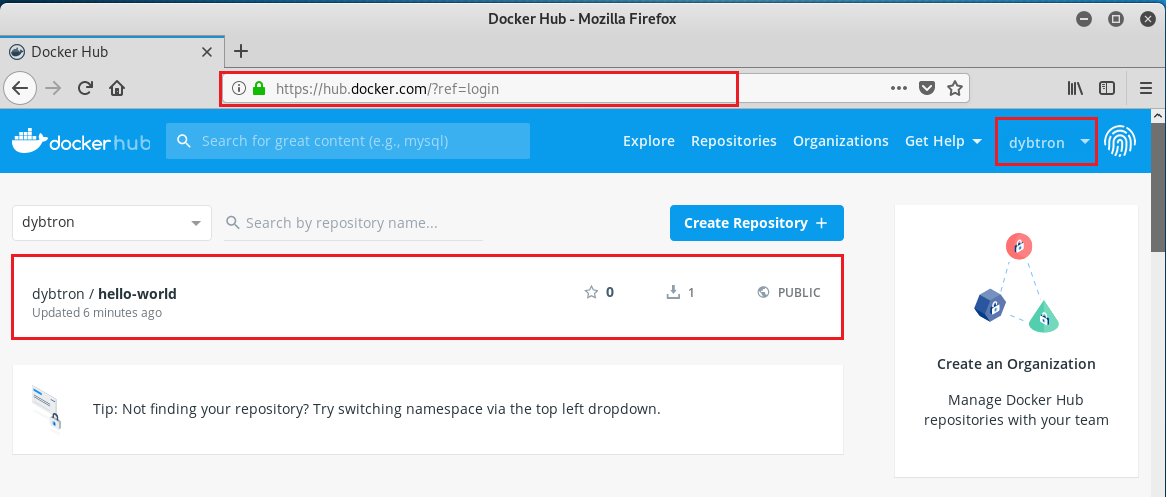
I hope it was fun. Next part “Advanced stuffs of Docker” is coming soon.